
Building a MotherDuck file browser

Building on my previous post about listing S3 files in DuckDB I thought it would be fun to build a client-side-only file browsing interface powered by S3 and MotherDuck.
The end goal is an app that:
Is purely front end and framework-less vanilla JS, using MotherDuck’s wasm-client
Allows users to plug in their own tokens / bring-your-own-database
Offers file browsing and filename search
Lets you view spreadsheets directly in the browser without downloading them
Lets you upload a new spreadsheet from your filesystem
Let’s get started!
Basic app structure
We’ll start with a version of the minimal setup with Vite that I documented the other day, slightly reorganized to use a Javascript class. For the sake of argument, we’ll use Shoelace since they have a nice tree component. So here’s our empty index.html file:
<!DOCTYPE html>
<html>
  <head>
    <title>MotherDuck File Browser</title>
    <link rel="stylesheet" href="https://cdn.jsdelivr.net/npm/@shoelace-style/shoelace@2.18.0/cdn/themes/light.css" />
    <script type="module" src="https://cdn.jsdelivr.net/npm/@shoelace-style/shoelace@2.18.0/cdn/shoelace-autoloader.js"></script>
  </head>
  <body>
    <script type="module" src="/main.js"></script>
  </body>
</html>
And our main.js file:
import { MDConnection } from '@motherduck/wasm-client';

class MotherDuckFileBrowser = {
    constructor (mdToken) {
        this.connection = MDConnection.create({
            mdToken
        });
    },
};
Getting a MotherDuck token
Before anything else can happen, we’ll need the user to enter a token from MotherDuck. We’ll use MotherDuck’s easy URL-and-clipboard authorization flow here, and display a prompt in a Shoelace modal:
import { MDConnection } from '@motherduck/wasm-client';

const APP_URL = "http://localhost:5173/#tokenInClipboard=true";

class MotherDuckFileBrowser = {

    constructor (mdToken) {
        this.connection = MDConnection.create({
            mdToken
        });
    },

    static promptForToken () {
        const modal = document.createElement('sl-modal');
        modal.label = "MotherDuck connection";
        modal.innerHTML = `
<form>
  <a href="https://app.motherduck.com/token-request?appName=File+browser&returnTo=${encodeURIComponent(APP_URL)}">Get a token</a>
  <sl-input label="MotherDuck token"
            type="password"
            name="token"
            password-toggle></sl-input>
  <button type="submit">Save token</button>
</form>
        `;
        modal.open = true;
        document.body.append(modal);
    },
};

document.addEventListener('DOMContentLoaded', MotherDuckFileBrowser.promptForToken);
Note: I’m using a Shoelace input component here because I like their password toggle, but I’m otherwise sticking with plain old HTML stuff.

Now we need to detect when the user gets redirected back to our page with a token in the clipboard, and drop it in for them if we can. I’ll do this in that same promptForToken method after showing the modal:
        modal.open = true;
        document.body.append(modal);

        if (window.location.hash === '#tokenInClipboard=true') {
            window.location.hash = '#';

            if (navigator.clipboard.readText) {
                modal.querySelector('[name=token]').value = await navigator.clipboard.readText();
                modal.querySelector('a').remove();
            } else {
                /* If the browser doesn't let us read from the clipboard directly,
                   we'll tell the user to paste it. */
                modal.querySelector('a').textContent = 'Paste the token from your clipboard below.';
                modal.querySelector('a').href = '';
            }
        }
Finishing the setup
There’s just one more thing — per my previous post, I believe there’s no DuckDB query that will figure out what bucket(s) you have available in your connected S3 account(s) — so we’ll need to ask the user for that too. For simplicity we’ll just add that in the same modal form:
        modal.innerHTML = `
<form>
  <a href="https://app.motherduck.com/token-request?appName=File+browser&returnTo=${encodeURIComponent(APP_URL)}">Get a token</a>
  <sl-input label="MotherDuck token"
            type="password"
            name="token"
            password-toggle></sl-input>
  <sl-input label="S3 bucket"
            type="text"
            name="bucket"></sl-input>
  <button type="submit">Save settings</button>
</form>
        `;
We just need to handle form submission. We’ll close the modal, grab the token and bucket, connect to MotherDuck, and query for all available files:
modal.querySelector('form').addEventListener('submit', async e => {
    e.preventDefault();
    modal.hide();
    const form = new FormData(e.target),
          token = form.get('token'),
          bucket = form.get('bucket');
    const app = new MotherDuckFileBrowser(token);
    const { data } = await app.connection.evaluateQuery(
      `SELECT * FROM GLOB('s3://${bucket}/**')`
    );
    /* data.toRows() will now return [{"filename": "s3://bucket/1.png"}, {"filename": "s3://bucket/path/to/2.txt"}]
});
Displaying our files
Now we’ve got our files. One last thing for now — we need to display them. As I mentioned above, we can use the sl-tree component to do this pretty easily.
This part is not that exciting, so I just asked Claude to give me a function that would handle splitting the file paths on slashes and then generate the DOM nodes for the full tree:
    buildFileTree (files, bucket) {
        // First create a nested object structure
        const tree = {};

        files.forEach(({file}) => {
            // Remove the s3:// prefix and split into parts
            const parts = file.replace(`s3://${bucket}/`, '').split('/');
            let current = tree;

            // Build nested object structure
            parts.forEach((part, i) => {
                if (i === parts.length - 1) {
                    // It's a file
                    current[part] = null;
                } else {
                    // It's a directory
                    current[part] = current[part] || {};
                }
                current = current[part];
            });
        });

        // Function to recursively build sl-tree-items
        function buildTreeHTML(obj, name = '') {
            if (obj === null) {
                // File node
                return `
        <sl-tree-item>
          ${name}
        </sl-tree-item>`;
            }

            // Directory node
            const children = Object.entries(obj)
                  .map(([key, value]) => buildTreeHTML(value, key))
                  .join('');

            if (!name) {
                // Root level - just return the tree
                return `
        <sl-tree>
          ${children}
        </sl-tree>`;
            }

            return `
      <sl-tree-item>
        <sl-icon slot="expand-icon" name="folder"></sl-icon>
        ${name}
        ${children}
      </sl-tree-item>`;
        }

        return buildTreeHTML(tree);
    }
Which we can then use in our submit handler to construct a tree and inject it into our document:
const app = new MotherDuckFileBrowser(token);
const { data } = await app.connection.evaluateQuery(
`SELECT * FROM GLOB('s3://${bucket}/**')`
);
const tree = app.buildFileTree(data.toRows(), bucket);
const div = document.createElement('div');
div.innerHTML = tree;
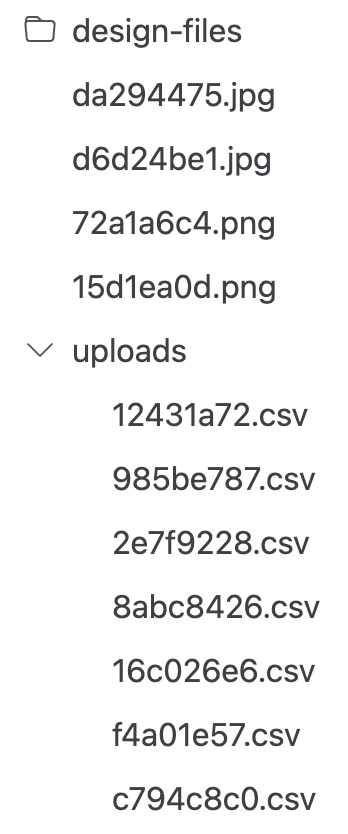
document.body.append(div);And we’re done … for now! We’ve now got a nice interactive tree-based web interface for browsing what files are in our S3 bucket.
In my next post(s) on this topic I’ll extend the app to add search, preview, upload, and more, as well as proper handling of errors, loading state, and very large results. For now, you can get the code here, or try out the demo here. Enjoy!